STEP-BY-STEP INSTRUCTIONS
There are different types of drones, but people find quadcopters to be more efficient, as they are easy to fly.
So for this step-by-step guide, we have focused on showing you how to build a quadcopter with pieces that you can buy separately:
STEP 1: MAKING THE FRAME
No matter what your drone is going to be, it must have a frame. So, the first task is to make a frame. For this purpose, you can use different materials, such as metal, plastic, or wood. These materials will differ based on how sturdy you intend the drone to be.
If you select wood for the frame, find a wood board that is longer than 60 cm and about 25-30 mm thick. Cut up this board in such a way as to get two laths which are 60cm long and 30mm wide. These two lengths are required to make the structure of your future quad.
Fig. Materials of Quad Copter Drone
Crossing these two laths you’ll make the X frame. Also, you will need a wooden sheet to make and add a rectangular piece in the central part of this frame. Its size should be 6×15 cm and about 2mm thick.
Of course, you can use other dimensions if you like, but these will get you a pretty nice quad. To connect these parts, you will need nails and glue. In case you decide to go with metal or plastic, the dimensions are similar but the way you connect the laths is going to be different.
STEP 2: PROPELLERS, ELECTRONIC SPEED CONTROLLERS, AND MOTORS
The ESCs (Electronic Speed Controllers), the motors, and the propellers are among the most important elements of a functional drone. So, you should get these components from an authorized store to ensure quality and reliability. They must be by the size of your drone, so bear this in mind when buying them. Do not be afraid to ask for assistance from someone at the store.
Fig. Copter of the Drone
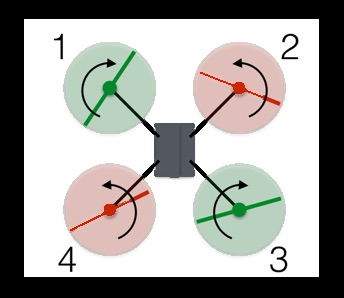
When looking for the motors (or rotors), you should know that multi-rotor drones produce greater speed and ensure a stable flight, as each rotor works with the other’s thrust points. For example, check out these rotors:
STEP 3: ASSEMBLE THE MOTORS
The next thing you need to do is drill the holes in the frame for the motors, according to the distance between the screw holes on the motors. It would be good to make another hole that will allow the clip and shaft of the motor to move freely.
However, you may skip this action if the motors already came with mountings. Put the motor in the appropriate place and fix it to the frame using the screws and a screwdriver.
STEP 4: MOUNT THE ELECTRONIC SPEED CONTROLLERS
After mounting the motors, you also have to mount the speed controllers. How will you do this? It is recommended to connect the speed controllers on the bottom side of the frame due to several reasons which involve the functionality of the drone. These reasons, among others, include that it will “unload” the upper side of the drone where other components should be added.
Fig. Circuit of the Drone
To fix the ESC very well to the frame, you need to use zip ties. This way, your ESCs are tied down and well secured while flying.
STEP 5: ADD THE LANDING GEAR
This gear is an important part when landing your UAV because it significantly reduces the shock when the drone lands on solid ground. It can be made in different ways, but you should be creative and make it in your own, unique way.
Fig. Working of Copter
Here’s one idea: find a metal pipe (about 6 inches in diameter) and cut off (with the appropriate tools) 4 rings that will be 1-2 cm thick. Of course, the size of these rings should be by the general size of your drone. You can then use duct tape to fix these pieces to the frame.
If you don’t like this metal pipe idea, you can also use other materials that are flexible but strong, such as some new plastics, or anything that will reduce shock.
STEP 6: FLIGHT CONTROLLER
Every flying drone must have a control system. This electronic system allows a drone to be stable in the air while flying and processes all the shifts and changes in direction and the wind.
Fig. Internal Construction
STEP 7: CHOOSING A RIGHT RC TX-RX (WIRELESS REMOTE CONTROL SYSTEM)
This is the remote control system that is needed to control a drone.
Fig. Remote Controller
There are various available RC control systems nowadays, like Futaba, Spectrum, Turing, Fly Sky, and so on. You can find more details and research all of these systems here:
STEP 8: MOUNT THE FLIGHT CONTROLLER
Once you choose the particular flight controller that is best for your needs, you need to mount it. There are several ways to mount it. For instance, you can place it on the top of the frame in a certain direction, but you need to make sure that all the components are fixed well before calibrating your drone. For this purpose, you can also use the zip ties which were mentioned above.
Fig. Flight Controller
It is recommended to put a small piece of sponge on the underside of the flight controller because it absorbs and reduces the vibrations from the motors. Thus, your drone will be more stable while flying, and stability is key to fly a drone.


